
Invite customers to your ordering portal
The ordering portal empowers your customers to place orders directly, view their order history, browse their product assortment, and view their prices and active campaigns.
Step 1: Invite the first user
Invite the first user via the customer card.
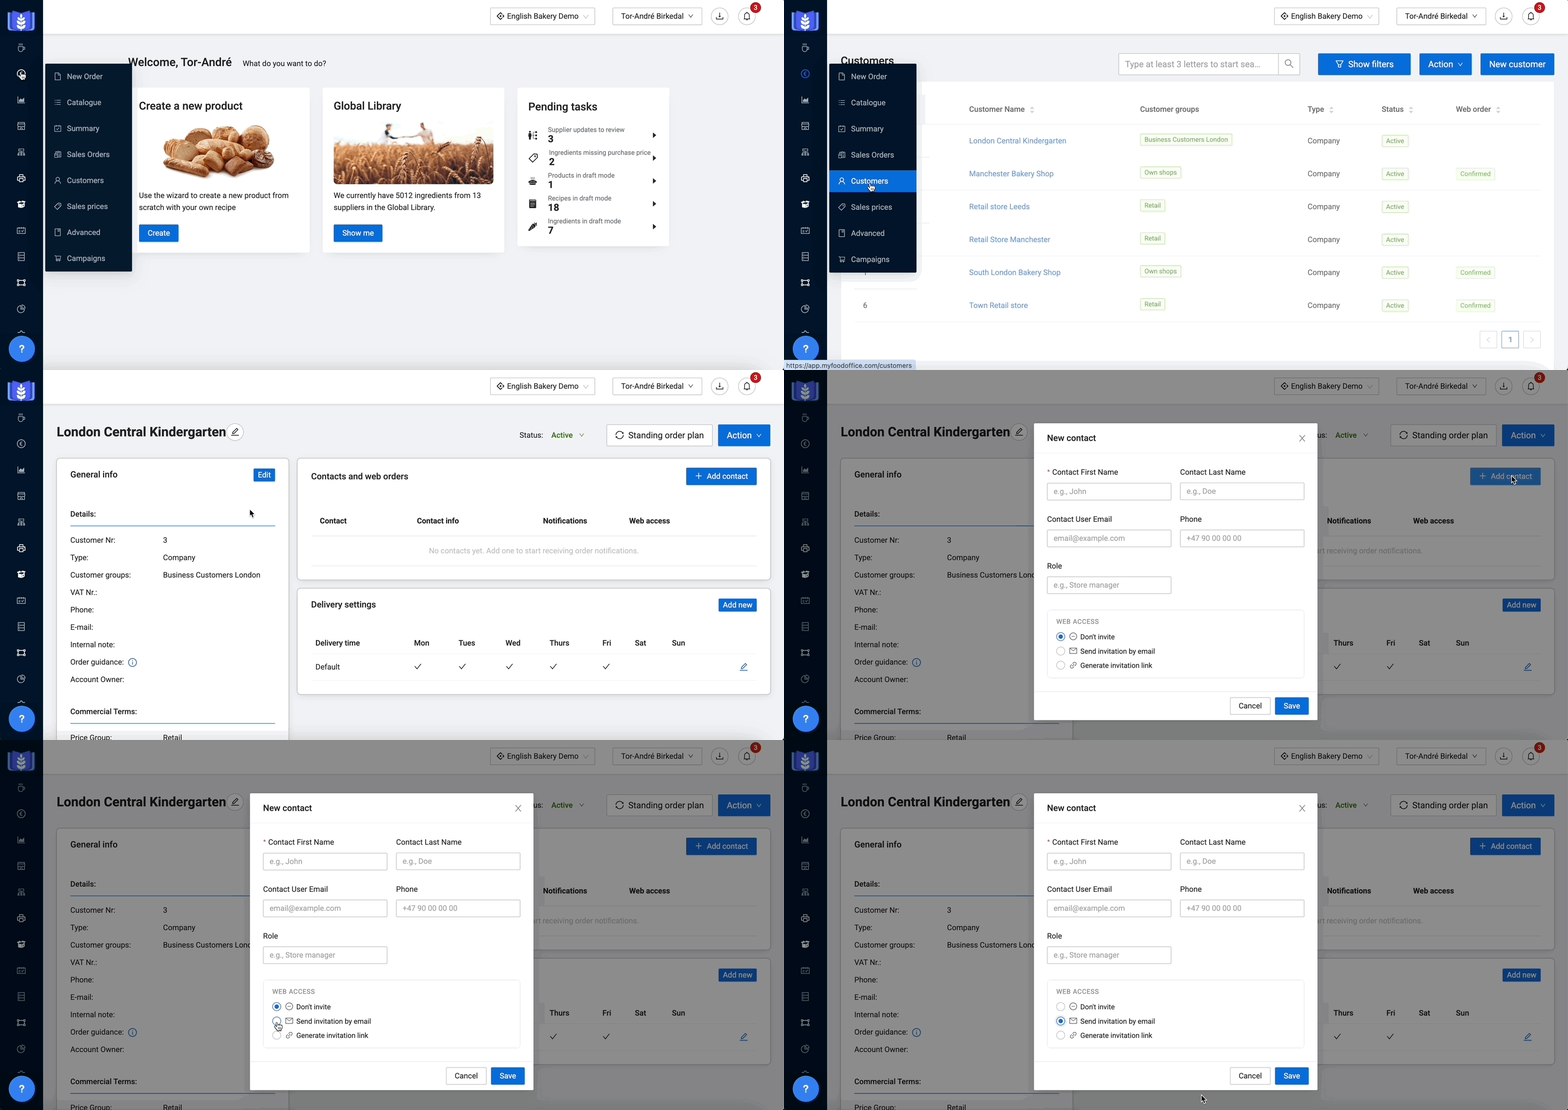
- Find the Customer: Go to Customers and search for the relevant customer.
- Open the Customer card: Click on the Customer's name to get to the Customer's page.
- Add Contact: In the window called Web Order, press Add Contact.
- Add Contact information: Fill in the name and email address of the person at the customer's end who will be the primary user (the administrator).
- Send the invitation: Choose Send invitation by mail to invite the contact. The system will automatically send an invitation with a link to set up a password and activate the portal.
| Tip: |
| Want to send a personalized email instead? Click Generate invitation link to manually copy the activation URL and paste it into your own email. |
Step 2: The user creates their account
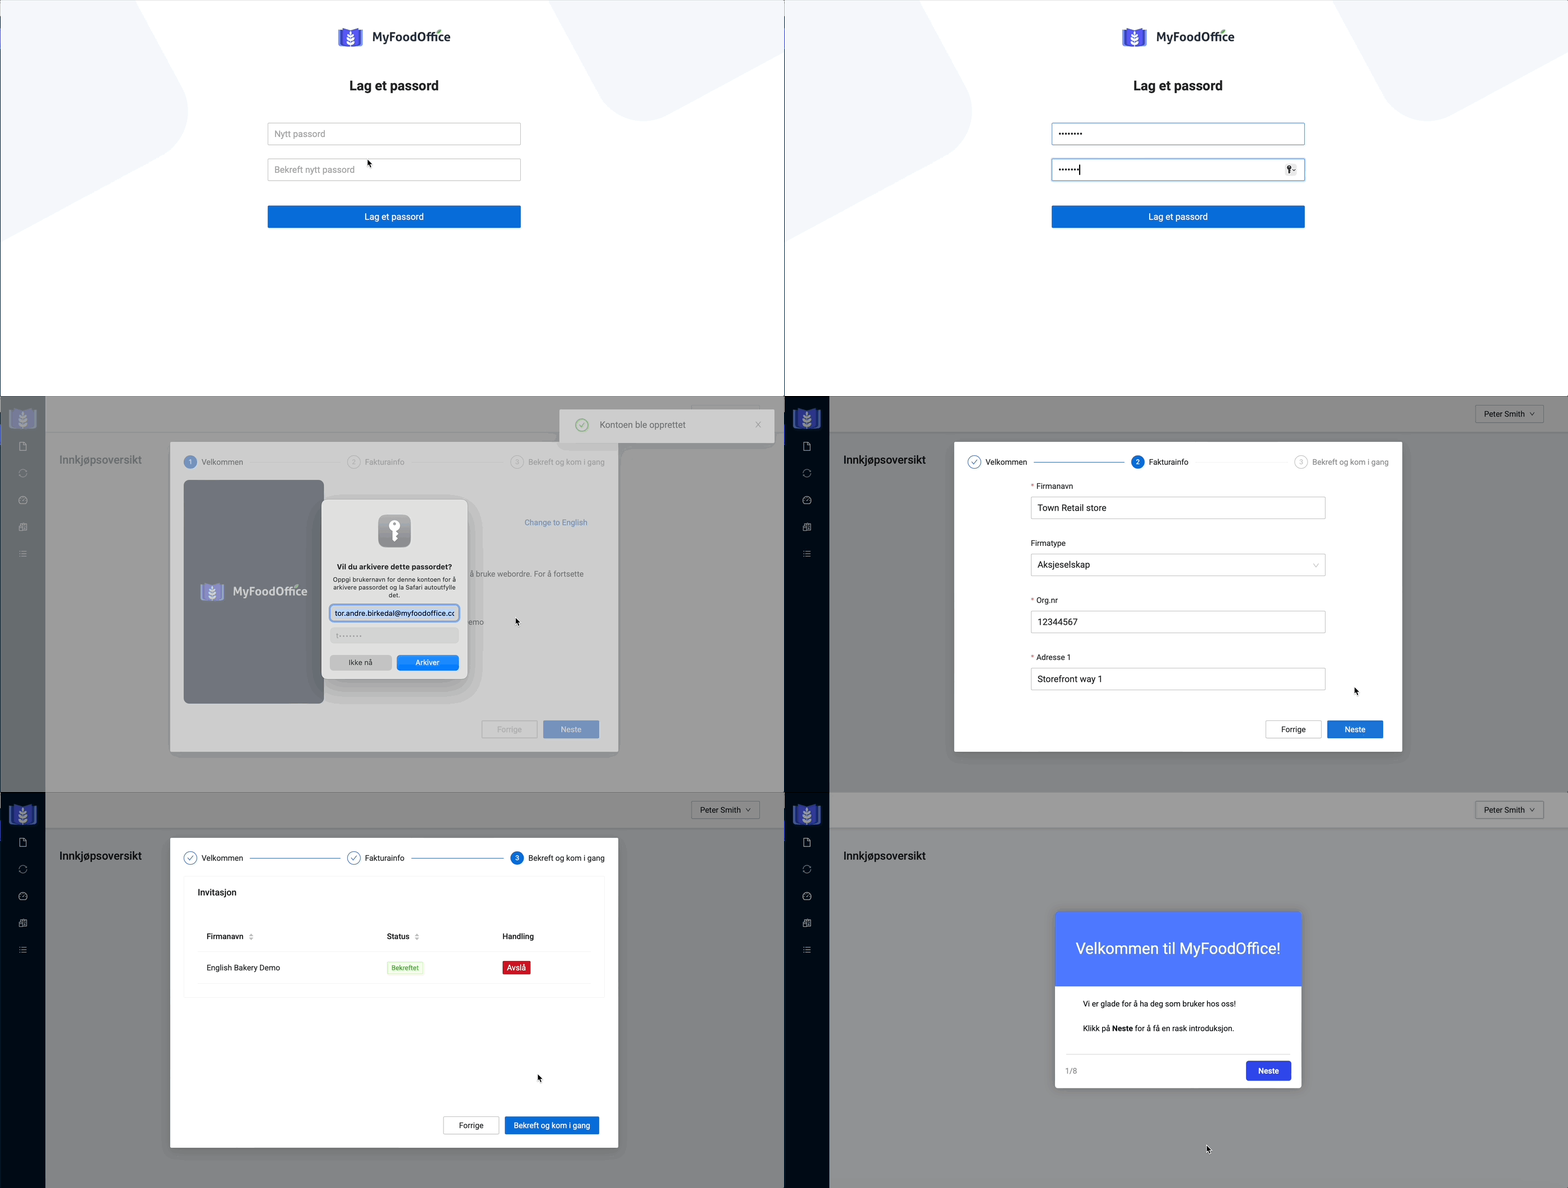
To complete the setup, the customer must activate their account.
- The customer clicks the link in their invitation email to open the registration page.
- They create a secure password and complete their account setup. (See the video on the right for a visual walkthrough).
| Important: |
| The portal will remain inactive for this customer until this first user fully completes their account activation. |
Step 3. Add additional users
Once the primary administrator has activated their account, more users can be added to the same customer profile. This can be done in two ways:
Option A: The Customer Manages It (Recommended)
Because the first user generally is an Administrator, they can add, manage, and invite additional team members directly within the portal's Manage users settings.
Option B: You Manage It
If the customer needs assistance, you can add users for them from the Customer Card:
- Go to the customer card: Find the company's customer card.
- User overview: All existing users are listed under Contacts and web order. Here you can also see if the account is activated.
- Add new user: Click Add contact.
- Send invitation: Enter the name and email address of the new Contact, choose Create as buyer user and click Save. The system will now send an invitation by email.
Step 4. Configure Email Order Notifications
You can customize which users receive email updates regarding order statuses. To edit these preferences, click the Pencil (Edit) Icon next to any contact and toggle the following options:
| Notification Trigger | What it does |
|---|---|
| Created | Sends an order confirmation copy as soon as an order is placed. |
| Updated | Sends an updated order copy whenever an existing order is edited. |
| Cancelled | Automatically notifies the contact if an order is cancelled. |
| Packed | Sends a notification when the order is packed digitally or when the packing slip is printed. |
❓ Frequently asked question (FAQ)
- Do I have to invite the first user? Yes, you must always invite the first user via the customer card to activate the portal for the relevant company.
- Can I add more users before the first one is active? No. Only when the first user has completed registration is the portal active, and you can add more users via the customer card.
- Can the customer add their own users? Yes, Admins can add users by going to Manage users and clicking New user.
- What do I do if I can't add a user? Contact support@myfoodoffice.com and we will help you.
Further reading