
Restrict Article Access with Customer Catalogues
How It Works: Restricted Articles vs. Sales Catalogues
Product visibility in MyFoodOffice is built on three simple rules:
- Restricted Articles — Mark any sales article as Restricted to hide it from all buyers by default. It only becomes visible to a customer once granted through a sales catalogue.
- Default Access — If a customer's Commercial Terms have no sales catalogue assigned, they automatically see all non-restricted sales articles.
- Seasonal Items — You don't need a catalogue to manage seasonality. Simply set an article's status to Inactive outside its active season to stop orders across the board.
Choosing a Sales Catalogue Type: Limited vs. Extended List
When creating a sales catalogue, pick the access behavior that matches your agreement with the customer:
Catalogue Type | Access Behavior | Typical Use Case |
|---|---|---|
Limited List | Strict, exclusive access — the buyer sees only the articles in this catalogue; all other products are hidden. | Contracted assortment, Own shops |
Extended List | Standard access + exclusives — the buyer sees all non-restricted articles, plus the restricted articles added to this list. | Standard clients who get access to a few special or limited-run items. |
Setting Up Restricted Access
Step 1: Mark articles as restricted (optional)
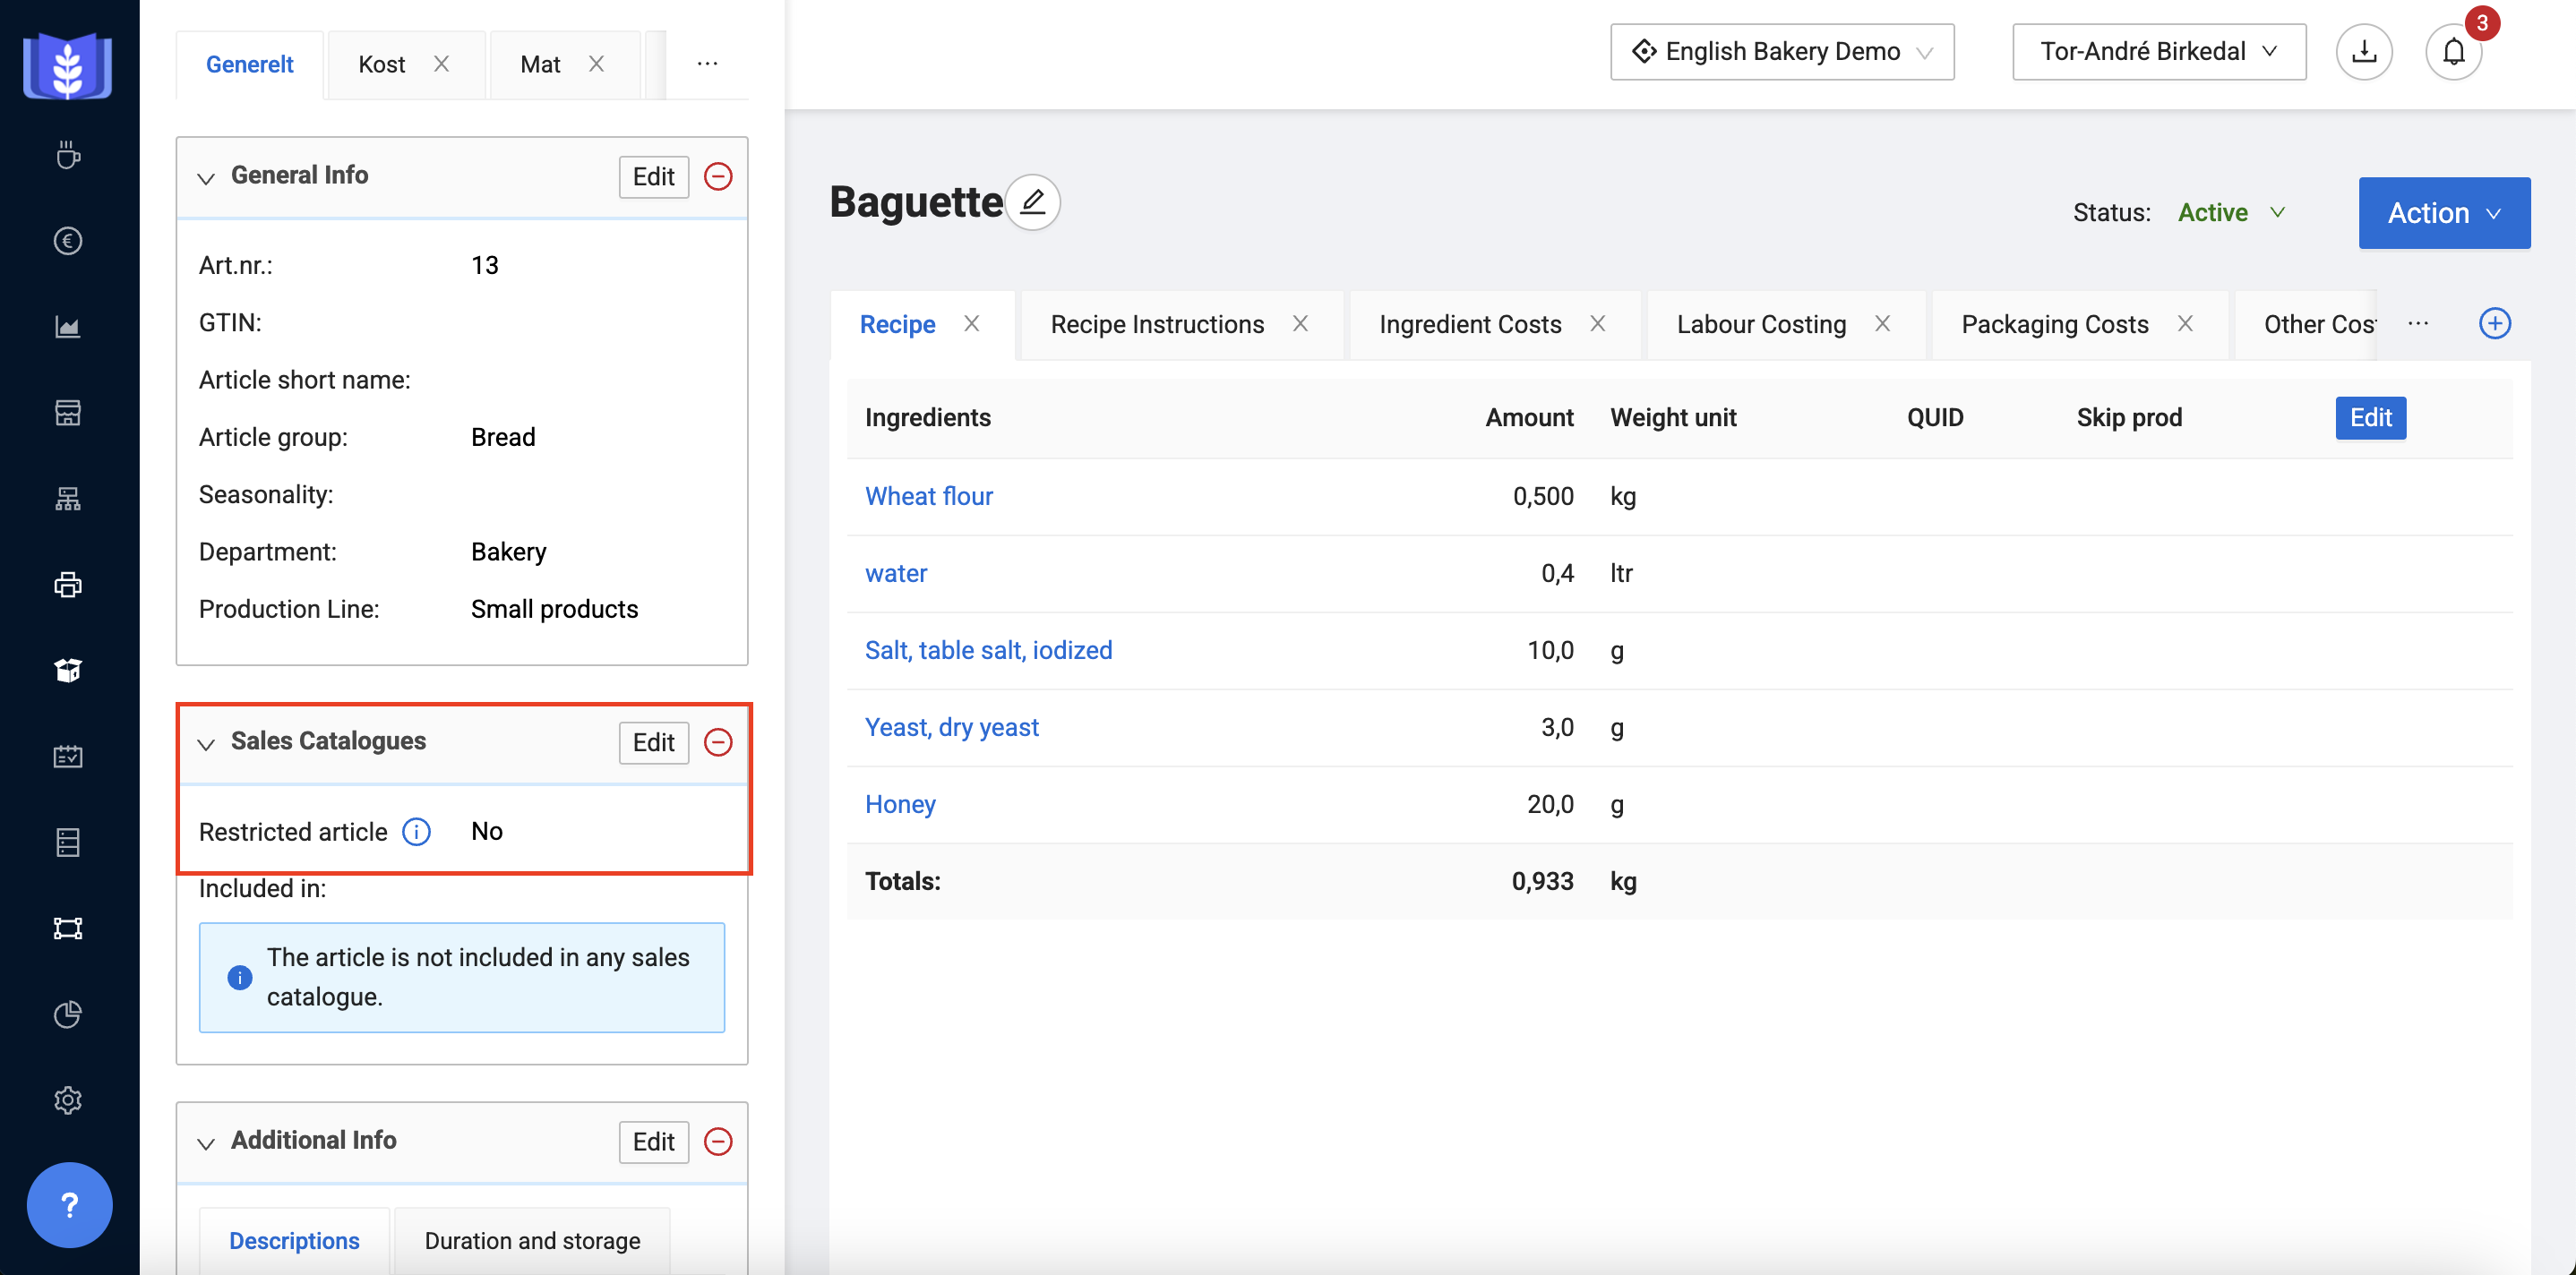
To hide an article from customers:
- Open the article's page.
- Click Edit on the widget called Sales Catalogues.
- Toggle Restricted article.
- Save
Step 2: Create a sales catalogue
- Go to Advanced > Sales Catalogues and click New Sales Catalogue.
- Give it a clear, descriptive name (e.g., "Own shops" or "Regional Retail chain A").
- Choose the catalogue type: Fixed List (default) or Extended List.
- Search for and add the relevant sales articles (or article groups) to the list, then save.
Step 3: Assign the catalogue to a customer
- Go to Customers and select the target client.
- Click Edit on the General info widget
- Under Sales Catalogues, select one or more catalogues to apply, then click Save.
Pro tip |
You can assign multiple sales catalogues to a single customer. MyFoodOffice automatically merges their permissions, so the customer sees the combined selection. |
Further reading: